Showing posts with label tutorials. Show all posts

Saturday, January 8, 2011

Reduce, reuse, regift, recycle

This Christmas I was inspired by Soulemama to save some trees and make reusable fabric gift bags.


It was such fun making them! At least the first few...  I did them with the suggested French seams until I realized that Santa would never get his gifts delivered on time at that rate, then switched to regular seams and pinking shears (next year, I'll start earlier...)  And I improvised a method of attaching the ribbon by folding it and stitching it down in a box that seemed a bit more natural to me for tying the gifts.  By 2am, after Midnight Mass, I had given in and was using last year's leftover paper gift bags -- cause that's still recycling, right?  And since K woke up at 3, I was glad I did. 

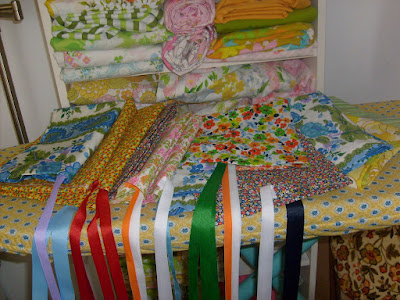
 Aside from the ecological benefits of wrapping packages this way, I now have the bonus of being able to give any gift in attractive packaging, without hunting for the Scotch tape.  What could be better?  Plus, I had the opportunity to make use of some of the gorgeous vintage fabrics that have been languishing in my stash waiting for a worthy project.  

Want to try one?  My favorite is the bag near the middle, the one with the orange, green and navy flowers.  It started out as an extremely worn, extremely dated vintage blouse that I had been holding on to with no idea what I was going to do with it.  Of course I could turn it into a bag!  If you don't have one of these in your closet (and I bet you do), it's easy to find them on half price day at the Goodwill. 

The easiest way is to turn the shirt inside out, cut the collar and sleeves off just below the underarms, and sew closed, but if you need to you could narrow the sides and sew them closed as well.  Either way, for my friends who are afraid of their sewing machines, it is just straight seams.  Leave the bottom hem intact (it is now the top of the bag) and sew a ribbon to the center.  Done.  You've spent less than 10 minutes sewing, which is 3 minutes more than you would have spent wrapping, but your friend will think you slaved all day.  And you saved a tree.  Go you.


Monday, February 15, 2010

Guinea pig mattress -- Adobe glitch

For those of you in Guinea Pig world who may be trying to get at my Guinea Pig Mattress Tutorial and having trouble, I'm told that there seems to be a bug in the latest version of the Adobe software. Turns out that you can load the PDF just fine when you click on it, but you can't *see* the PDF in some browsers until you *resize* the browser screen. It's not a disaster, and I'm sure Adobe will get it cleared up soon -- but it's been confusing to more than one person, and I want the instructions to be available to anyone who'd like to use them, so I thought I'd mention the fix for it here. Happy sewing!

Sunday, January 17, 2010

Guinea Pig Crafting

Have I introduced you to the two newest members of our family? Meet Chancellor and Gordon, two Peruvian guinea pigs with a lot of hair and a lot of style!


Despite what the above photo would have you believe, they spend their days on a bed of fleece -- it wicks moisture right through to an absorbent layer beneath, which heretofore has been a towel, but as of today they sleep and play on a mama-made Guinea Pig Mattress. Cuddly fleece on top, absorbent diaper soaker fabric inside and waterproof barrier on the bottom. Nothing but the best for my boys!

I had seen instructions for making this sort of thing in other places online, but none of them seemed to fit my style -- either too much sewing was involved or the directions were too complicated or something -- so I set out to make a fleece mattress that was simpler in design and even simpler to construct. The result pleased me so much that I made another one and wrote a tutorial for it, and here it is for you to use:

Guinea Pig Fleece Mattress Tutorial (PDF)

I invite you to try it out, let me know what worked and what didn't work and what needs improvement, what changes you made and how your piggies liked it. I hope you're as happy with your results as I was with mine!


(For those of you who are not cavy-crazy, if you'd care to read the tutorial and offer constructive criticism, I'd be grateful for that, too.)