Showing posts with label sewing. Show all posts

Monday, May 23, 2011

Potato-Chip Tea Towels


I have been sitting on a bunch of feedsack material for several years now -- I think I bought it when I was getting ready to paint the studio and was planning to make my own curtains.  Then I found the pretty eyelet curtains that are still hanging from my windows and tucked the feedsacks away. 

Recently, I noticed that my kitchen linens were in rags but was reluctant to buy new ones.  I went to get some plain white birds-eye cotton to make dish towels, but the feed sacks caught my eye.  What good were they doing anybody in my fabric closet?

Enter Potato-Chip Tea Towels, so called because you can't make just one.

I followed the dish towel pattern in Linen, Wool, Cotton, omitting the zig-zag stripes and adding mitered corners to the hems (which I needed to learn how to do, and am so glad I did)  after doing about a few towels without them and getting annoyed at having to stop and pick out stitches at the lumpy ends.   My favorite thing about these towels is the hanging loop detail -- I plan to put up hooks in my kitchen so I can put them on display!

Friday, April 29, 2011

Mostly about rick-rack

There are how-to-apply-rick-rack tutorials all over the blogosphere.  I did a search when I went to make these lavender sachets.  I had the lavender, the rick rack and some charm squares and a need for sachets (read: a burgeoning fiber collection) but the thought of pinning all those rick-rack bumps in between two pieces of fabric to make the pretty rippled edging on the sachets made my head hurt.  So, through a series of tutorials, I devised a better way for myself.
I started with one charm square and some rick-rack.  Did you know that you can heat-seal the end of the rick-rack with your iron so that it doesn't fray?  I didn't.  I did that, then laid the rick-rack down on the edge of the charm square (look, Ma, no pins!) and began to sew, keeping slightly to the right of center.
As I neared each corner I stopped sewing and turned the rick-rack, then pivoted the fabric under the presser foot and moved the needle by hand several stitches until the needle was in position to sew straight forward again.  I sewed all the way around the charm square until the rick-rack overlapped itself.  After I finished sewing, I cut the thread and then cut the rick-rack carefully just beyond where the thread stopped.
I used the iron to heat-seal the cut end of the rick-rack once again.  Then I cut a six-inch length of grosgrain ribbon and folded it in half.

I centered the ribbon on the right side of a second charm square, with the cut ends of the ribbon at the top, laying the first charm square on top of them.
Then I sewed around four corners and three sides of the charm squares along the stitching line for the rick-rack.  I left the fourth side open for turning, and I trimmed the corners, being careful not to cut the rick-rack.
This one did not come out perfectly -- some of the rick-rack bumps have little holes underneath them, and the rick-rack doesn't meet exactly at the end.  I used my scissors to trim the rick-rack so that it looked a little more even, then heat-sealed it, but I am not particularly happy with that solution.  The next step, top-stitching around the edges of the charm squares to close the hole and add a decorative touch, helped to cover the holes. 
I think they're cute!

Thanks for bearing with me -- this post was mostly for my own benefit, so I can remember my own method for applying rick-rack, but I'd be glad to know if it was helpful to anyone else -- or if any readers have their own methods they'd like to share.

Tuesday, September 28, 2010

It's about the process

The project started because I had been in the hospital and a nurse, who was expecting a baby before long, had been extra kind to me.  Before I even got home I knew that I wanted to make the super-soft patchwork-bound blanket from Weekend Sewing for Baby C.  As soon as I was feeling up to it, I headed down to the fabric store and bought a length of beautifully soft wool/cashmere blend, and fearlessly tossed it in the washing machine to felt it.  The results were amazing, dense and plush and warm, exactly what I'd had in mind.


I cut the two pieces, but not carefully, and the blanket ended up being an inch short on all four sides because of it.  The blanket-construction and decorative zig-zagging went well -- a pleasant surprise for me because the other times I've made this blanket I've botched those.  Then I sat down with my bins of fabric to start creating the patchwork binding strips.


It was so hard to decide!  I wanted to use all of my favorites -- it took a long time to narrow it down.  Finally I worked out my patchwork panel.


I really like this method of making binding -- it leaves so much room for interpretation and creativity.  Here are the finished strips, ready to sew on the blanket:


Here is the bound blanket -- it doesn't look too bad, although the binding is not sewn on perfectly and there was some difficulty sewing through the thicker parts where the binding overlapped (this was done before my Kenmore came home.)


Had I left well enough alone, I think the blanket would have been gift-able.  But because I knew the baby's name, I wanted to personalize it.  This is where I ran into trouble.  


Because I bought the wrong kind of interfacing (Wonder Under instead of single-sided fusible) I had to cut out the 'C' three times before I accepted the fact that I was going to have to fuse the thing on in one layer and machine-applique instead of stitching the letter to the fusible, turning the thing inside-out, ironing it on the blanket and doing a decorative stitch by hand.  Enter the dreaded zig-zag stitch.  Although I tested it on a scrap and thought I had it right, I accidentally set it too wide and too short, making for a very sloppy stitching line around the 'C.'  Hoping to disguise my messy work, I satin-stitched an edging around the letter with an embroidery needle and pearl cotton.  You can see the result below:

So I'm not at all sure what to do about this.  Give it away?  Cut it up for scraps?  Make another one with the fabric I have left over?  The truth is that I don't like it very much.

Thoughts?

Wednesday, September 22, 2010

Up and running

Just a quick post to let you know that my Sears Kenmore 1430 Zig Zag is back in my possession, and after some fiddling and studying I have it humming nicely on some scrap fabric.  K is home "sick" (read: needing Mama time) today so I haven't been able to do any real sewing, but I will post when I get a chance to zip through a quick test project.

The word, through the fabric store owner, from the repairman, is that I have a good sturdy machine with a pretty stitch that, if I take care of it, will last me a lifetime.  Cost:  $50 for the machine at the thrift store; $84 for repairs.  Score!

Saturday, September 18, 2010

Vintage Kenmore

Earlier in the week, I found this at my favorite thrift store:


I noted the model number and did a little research on the thing.


There's not a huge amount of information readily available, but apparently the Kenmore 1430 Zig Zag was a pretty popular model somewhere in the vicinity of 1972 and is an all-metal workhorse that can sew easily through several layers of denim and even leather (demonstrated here on YouTube) and has "6 quarters" of room underneath the presser foot -- great for quilting. 

Just the same, the machine I found was not in working condition and cost a fair amount of money, so I passed on it.  But it stuck in my mind, and I visit that thrift store several times a week.  Yesterday when I was paying for my latest finds, I looked up at the marquee where they advertise the day's sale tag color -- blue.  Of course, nothing I was buying had a blue tag.  But.  The vintage Kenmore sported a blue sticker.  I asked the saleslady if that counted, and she gave me the nod.  Half of a fair amount of money seemed reasonable to me -- if the thing could not be fixed I could sell it for parts -- so I nodded and she rang it up.

Now I am totally beside myself.  I rushed the machine to my favorite fabric store in downtown Burlington -- they have a man there who comes in to do repairs, and he'll be in on Tuesday.  I can't wait to hear from him!  In the meantime, I have joined the Kenmore Vintage Sewing Machine group on Yahoo Groups (yes, of course there is one -- search for "vintagekenmoressew" if you are so inclined) and am combing Ebay for parts and accessories.  What fun!

Thursday, September 16, 2010

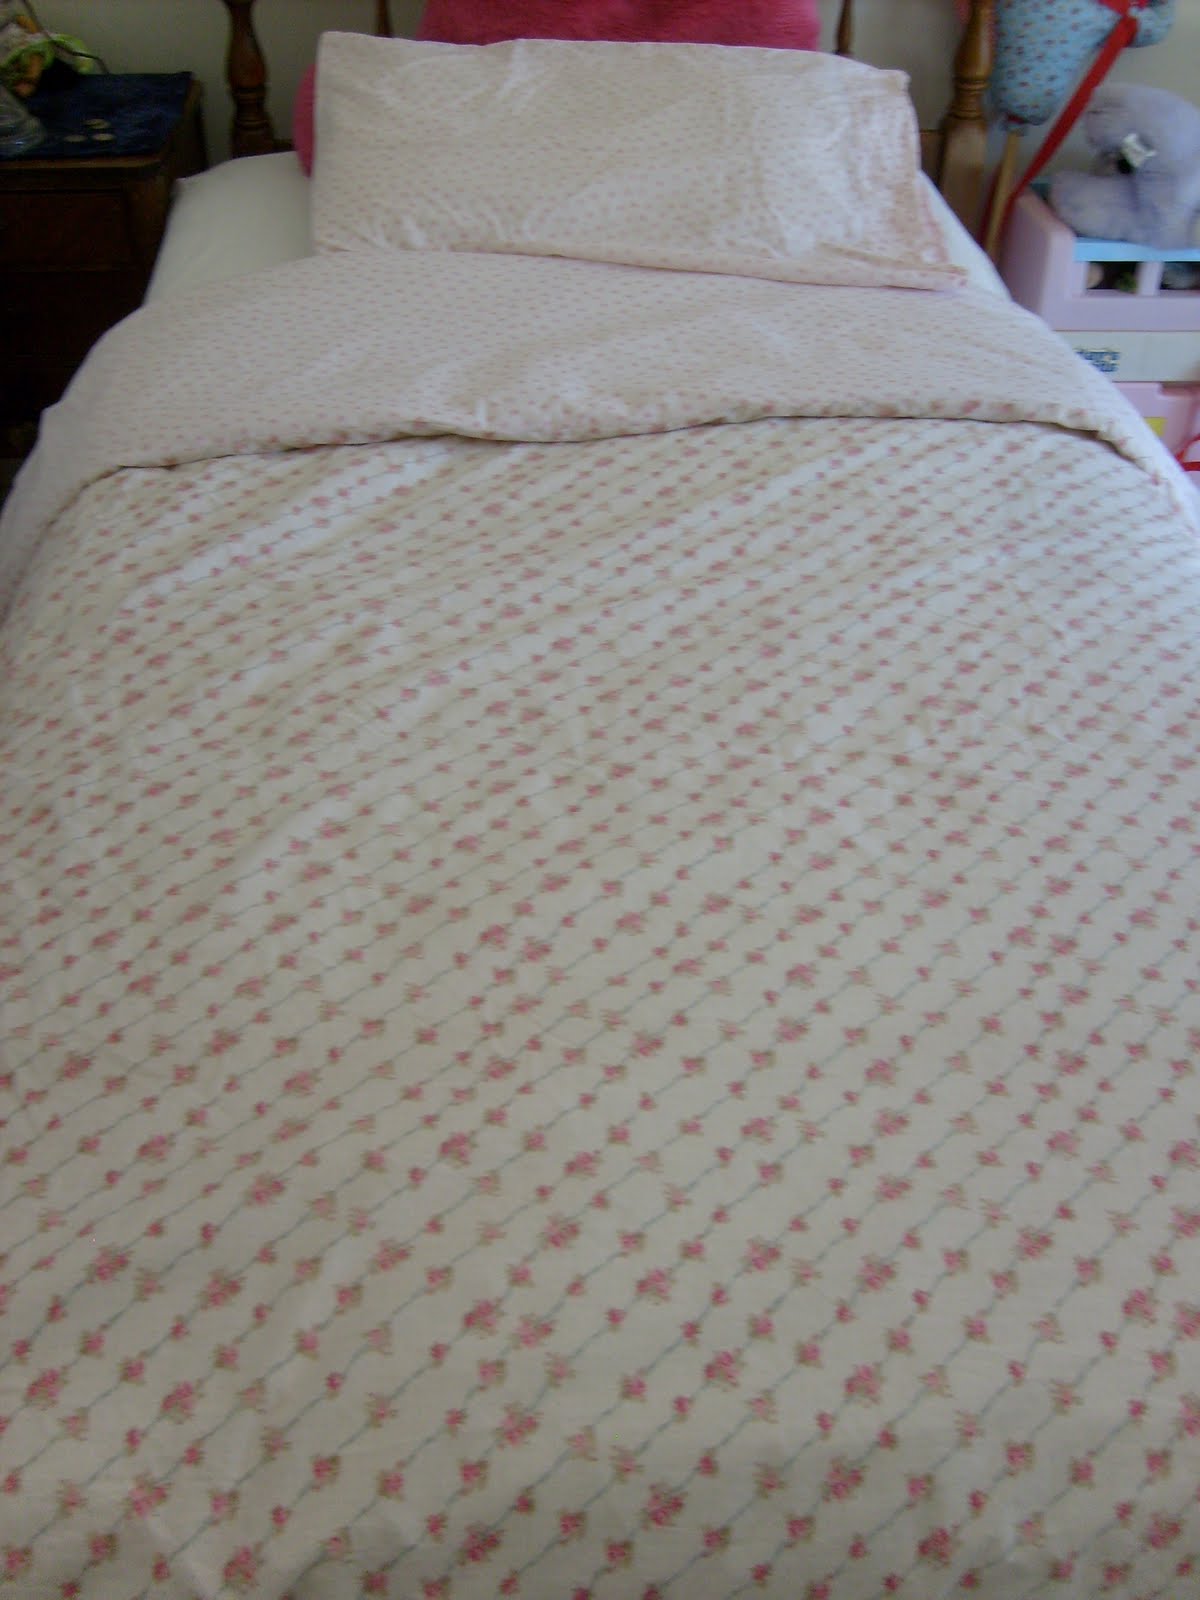
K's duvet cover: a taste of independence

In the interest of putting K in charge of making her own bed, I bought her a twin-sized duvet some time ago.  Not wanting to spend $39.95 or more on a cover for it, however, I let it sit in the linen closet and rot.  Despite the fabulous collection of vintage bedsheets toppling the bookcase in my studio next door.  Somehow flower power just doesn't fit the image I have of my girl.

Not long ago, however, I happened upon a complete set of twin-sized rosebud-print sheets from Target's Simply Shabby Chic collection in the Salvation Army store -- a guilty (because I have more than once paid full price for this line) favorite of mine.  I snapped them up and set them aside, waiting, waiting.   And lo and behold, the other week, it happened!  A different sheet from the same line popped up in the Linens section and made its way into my hot little hands.  Woo-hoo!


I used the tutorial at the "Decorating: a journal"  blog that I have used before -- it is straightforward and simple and requires no fasteners, which has worked well with the first duvet cover I made.


This will suit Miss K well and be comfy and cozy to boot.  I'm looking forward to many a toasty morning snuggled up with her, planning for the day to come and maybe goofing off a bit?  And she will be so proud to pull up the covers and have a neat and tidy bed in no time!  I think it was worth the wait.

Tuesday, April 27, 2010

In the bag


I have been busy making bags, because (unless they're the plastic grocery kind) you can never have too many, and it is always possible to make one suited to your exact purpose that is also pretty.


These were a snap to make using Betz White's tutorial.


For example, these shoe bags from vintage bedsheets (and yes, I have a pair of pajama pants in each of those patterns) replaced the plastic bags my dear friend was using to pack shoes in when she traveled.


This bag was a bit challenging with its pleats and lining, but look how cute it is!
I had fun making the "Mama's Bag" from Amanda Soule's Handmade Home -- the body is a thrifted brocade curtain, the lining is cotton poplin, the straps linen and the tie grosgrain ribbon, and the bright aqua and yellow helped to cheer me up through a dark, snowy winter.  I've been keeping my red cashmere/merino chemo-cap-in-progress in it and it makes me feel quite sophisticated.

What a fabulous way to repurpose a pillowcase!
I have been looking for a good pattern for a market tote bag for some time now -- one Christmas I made a bunch of Morsbags as gifts and kept a few for myself, but found they didn't hold up well against the volume of groceries I needed to bring home.  And forget those ugly cheapie "canvas" bags they sell in the supermarkets.  I rip right through them.  But the other day I found this tutorial on Creative Kismet, and I was overjoyed!  A good, sturdy and adorable market bag made with materials I own to the point of ridiculousness.  What could be better?

I'm going to make a dress for K with the other pillowcase from this pair!
Ah, but now I'm on the hunt for a good produce-bag pattern.  Because yesterday while I was thrifting I found a gorgeous Laura Ashley rose-print sheer that will make up into as many produce-bags as I could need, and possibly more.  Once I find it -- Look out, Wegman's!

Friday, April 16, 2010

International girl

Here is K getting ready for school on International Day.  She is (sort of) dressed as a "Russian Peasant Girl" in long gathered skirt, peasant blouse and babushka scarf (courtesy of Carefree Clothes for Girls.)  And I have become One of Those Moms who stay up late the night before The Day Of, sewing the costume the child Has To Have and didn't plan ahead for.  I could kick myself for doing it, but at least she looks cute -- if not exactly authentic.  (Her idea was to go in her Sock Monkey Pajamas, because they say "Made in Vietnam" on the label.  Not exactly what the teacher had in mind, honey.  I like your creative thinking, though.)

Thursday, April 15, 2010

Stashbusting; or, I am totally making this quilt

I have officially declared May "No New Fabric Month."  In preparation, I have been rummaging through my scrap bins to identify usable material, and cutting it up into sizes predetermined by the good folks at Moda, who make those irresistible charm packs, layer cakes and jelly rolls lying around next to the bolts in the quilting stores. 

This is what I got out of the "small scraps" bin!

I could buy any number of books of quilt patterns that utilize the pre-cuts, but I was feeling thrifty and started hunting around on the web for free patterns, and I found this tutorial for a Value Quilt.  I love it!  It cries out to me!  I must make one!  You will excuse me, please, if I go back to my scrap bins and keep cutting.  I am on a mission!


Tuesday, April 13, 2010

Quick fix

I needed a quick project to do this morning in between finishing a quilt top and preparing it for quilting, and the guinea pigs needed some new bedding, so --

I think the blue of the mattress pad brings out the rust in Gordon's fur!
If I had given Chancellor his name, it would have been Spike.

Tuesday, April 6, 2010

Ready and waiting

Here's the quilt I made to take to this week's prayer quilting session.  It's taken from a free pattern I got from Moda when I bought one of their charm packs last week -- hopefully you'll see the quilt I made from those squares soon; it only wants binding.  For this one I made my own "charm pack" out of 5" squares from scraps of vintage bed-sheet fabric. It was a joy to put together; at every stage I loved it more and more.


I was not at all certain about the plaid fabric for the backing, but I dove in with it and I think it gives a fresh, modern look to the old-fashioned florals.  I would have liked to quilt this one but of course the prayer quilts are tied, so I put in pink pearl cotton ties and it's all set to go.  An extremely satisfying 24-hour project.  Will definitely be doing this one again.

Vintage linens

Who has time to post with a collection of vintage linens this pretty? I'm making a prayer quilt, a tablecloth, a set of napkins, a dress (dresses?) and some charm packs for a rainy day out of the scraps. Who has time to clean up the studio with all that to do?


Monday, January 18, 2010

Living Room


Since the cold weather came we've been spending less and less time in the "TV Room," where it's freezing, and more and more time in the Living Room, where it's toasty warm. We read, play, knit, draw, talk, giggle, and fiddle around on our laptops here. The guinea pigs live next door in the dining room (don't ask me to explain how that happened) and we chat with them in their cage, and sometimes set up their play pen in here and let them run around and munch on veggies while we fend off the cats. A lot of living gets done here. And I wanted to mark that, somehow.

Enter Amanda Soule's Handmade Home. Her One-Word Banner project fit the bill just right, I think. The letters are cotton fabric scraps appliqued onto felted wool rectangles, and they're just sewn at intervals onto a length of bias tape. (Ah, the magic of bias tape. Why is there never a sale on bias tape?) As usual, I love that they're red.


While I was working on appliqueing the letters and nearly finished, K walked into the studio; she saw l, y, and a heart. She asked what word I was making, and I asked if she could guess. "Something with love?" she ventured. Yes! Yes! Something with love.

Sunday, January 17, 2010

Guinea Pig Crafting

Have I introduced you to the two newest members of our family? Meet Chancellor and Gordon, two Peruvian guinea pigs with a lot of hair and a lot of style!


Despite what the above photo would have you believe, they spend their days on a bed of fleece -- it wicks moisture right through to an absorbent layer beneath, which heretofore has been a towel, but as of today they sleep and play on a mama-made Guinea Pig Mattress. Cuddly fleece on top, absorbent diaper soaker fabric inside and waterproof barrier on the bottom. Nothing but the best for my boys!

I had seen instructions for making this sort of thing in other places online, but none of them seemed to fit my style -- either too much sewing was involved or the directions were too complicated or something -- so I set out to make a fleece mattress that was simpler in design and even simpler to construct. The result pleased me so much that I made another one and wrote a tutorial for it, and here it is for you to use:

Guinea Pig Fleece Mattress Tutorial (PDF)

I invite you to try it out, let me know what worked and what didn't work and what needs improvement, what changes you made and how your piggies liked it. I hope you're as happy with your results as I was with mine!


(For those of you who are not cavy-crazy, if you'd care to read the tutorial and offer constructive criticism, I'd be grateful for that, too.)

Friday, January 15, 2010

Smocks and more

K has a birthday party to go to tomorrow. We needed a present and something special to wear, stat. I found the pattern for this "Swing Swing Smock" in Amy Karol's Bend the Rules Sewing and modified it to fit my six-year-old. Thanks to Amy's zig-zag method of applying bias tape, it was a cinch to make -- took maybe an hour, tops. The fabric is Amy Butler from my stash, and I have a yard of that pocket material waiting to become a Lazy Days Skirt (by Oliver & S) -- but we needed something warm enough for K to wear now.


Out there on the Internet are tutorials galore, and I found one to make a child's skirt from an adult's sweater and another to make a child's leggings from the arms and shoulders left over from the adult's sweater made into the child's skirt. As it happened, I had a brown cashmere sweater that I didn't enjoy wearing very much, that was just the size, shape and softness to make into a skirt-and-leggings set for K.

She was delighted with her new outfit when she came home from school today and it was all I could do to get it off of her at bedtime! I'm just relieved that both pieces fit and were comfortable for her.


For her friend's birthday present we found fabric featuring the characters from Disney's The Princess and the Frog -- K reports that the child is Disney-princess crazy -- and I made another smock. I didn't have an appropriate sweater to make a skirt/legging set so I purchased a t-shirt and leggings at Target that I hope will fit her. I am less enthralled with this outfit than I am with the one for K, but if it suits her classmate's taste (which I hope it does), then I'm happy.

Posted by Picasa

Sunday, December 13, 2009

Beach blanket -- take two

I happened upon a gorgeous green chenille bedspread the other week and I knew it was time to try the beach blanket project again.  I'm showing you the back first because I love how D and I managed to cut the center medallion out so nicely.  It's not like anyone will see it, but I love knowing it's there.


The front side is made up of ten squares cut from vintage bedsheets.  I have already made comfy pajama pants from seven of these bedsheets, and I plan to make pajama pants from the remnants of the other three and revel in their flowery goodness!


And it all wraps up into a neat little package at the end. Bring on the beach weather!


Sunday, November 15, 2009

Vintage, yellow and roses

What could be nicer to wear to bed? This fabulous pattern from Ducky House uses the hem on a vintage bedsheet to finish a tailor-made pair of pajama pants, and it couldn't be easier.


The pajama pants experimentation continues. I was disappointed, when I tried these on, to find that the too-high-slightly-snug-waist problem had shown up again, but this time I took action. I cut off the waist casing that I had just sewn and sewed one on the now-shorter pants, tried them on and was reasonably satisfied with the results. I'm going to make the waist on the next pair even lower, and I think that will solve the problem altogether.

And yes, for those of you who are wondering, I did iron them before I photographed them, but I doubt if I'll need to do it again as they're made with No-Iron Percale. Definitely a plus.

Monday, November 9, 2009

The (doubly) green artsy blanket

As promised, my weekend project:

"It's a cat bed for two cats!" exclaimed K.

It's really a free-form sort-of patchwork felted sweater-blanket -- or, as one seller on Etsy described their version of it, an Artisan Crafted Repurposed Felted Wool Blanket.


It's made from the trunks and sleeves of maybe 12 or 15 felted wool sweaters, zig-zagged together with lapped seams (that just seemed the sturdiest way to do it) and edged on the sides with ribbing cut from another sweater. I considered making it reversible by doubling the sweater pieces, but a) I wasn't sure how to do that, b) I think the backs of the sweaters are softer to the touch and would be nicer to have against your skin anyway, and c) I kind of thought that two layers of sweater would make the blanket too heavy. At about 76" x 87", it covers our queen-sized bed. (I didn't mean for it to get so big, but you know how things go...)

I washed it in cold on my machine's "hand-wash" cycle, and dried it on high (I dry everything on high; it's just a bad habit I have) and it came out soft and fluffy, if a little fuzzy. I plan to go over it with a sweater stone but I need to buy a new one when I go to the fabric store, so for now I'll live with the fuzz.

I love that this blanket is made from repurposed materials (hence the name), and I love that it feels like wearing an extra sweater in bed without the uncomfortable bulk of actually doing so. It will compliment my pillowcase quilt nicely (that's for another post) and making it is a step toward developing more of my own designs. I also love that it is green.