Showing posts with label experiments. Show all posts

Monday, August 1, 2011

Thoughts on improvisational piecing


I am loving the improvisational piecing in this quilt, which is "Nate's Quilt" from Malka Dubrawski's Fresh Quilting: Fearless Color, Design, and Inspiration.

Things I am learning:
  1. The look might be random, but there's a ton of planning that goes into that look.
  2. The build might be wonky, but there's a lot of skill that goes into building the wonkiness.  (I need to work on this part.)
  3. There are many degrees of randomness and wonkiness, between quilters and within quilts.  (Take a look at Alissa Haight Carlton and Kristen Lejniek's Block Party--The Modern Quilting Bee: The Journey of 12 Women, 1 Blog, & 12 Improvisational Projects for examples.)
Questions I'm considering:
  1. Can there be too much wonk?  (I think the answer is, sometimes, but it can be balanced with similar wonk elsewhere in the same quilt.  I had help with this question from a more experienced quilter.)
  2. Where can I find fabric that is not quilting cotton to quilt and sew with?  Linen, silk, good corduroy, wool suiting?  (I am not impressed with what I find at the chain stores.)  There is one store in our town that carries some of these things, but are there other sources?  I am not against ordering online, but I prefer to see and touch what I am buying.
  3. Where can I find other quilters who are interested in modern quilting?  One answer would be to take a class, but I not had good experiences in knitting classes I have taken and worry that a quilting class would be similar.  I would rather spend my money on good fabric and books.  

Saturday, July 30, 2011

More fabric love: Planning a baby quilt


I had fun this morning pulling favorite fabrics from my stash and combining them with some fat quarters I purchased last week to make a  quilt for a new baby I'm going to be meeting soon.  I'm really feeling inspired to go wild with prints and colors, and I'm looking forward to doing some improvisational piecing.  Stay tuned -- this is going to be a wild ride!

Tuesday, July 12, 2011

Journal Cozy

I love my patchwork Moleskine notebooks so much that I dislike writing in plain ones anymore -- to the point that I will avoid making notes until I have time to decorate a new notebook.  (I know that's ridiculous.)  Then inspiration hit, in the form of an embellished Ann Taylor sweater from the thrift store.  Why not make a journal cozy that I could reuse?


It took a lot of improvisation to get to this design.  Some things I learned:
  • Don't try to machine-sew over beads and sequins.  Just don't.
  • It might be a good idea to use some stabilizer if you're going to sew satin ribbon to sweater fabric.  If you plan to do this, make sure ahead of time that you have some on hand.  Otherwise, you might have to change your plans.
  • Sometimes you end up with a significantly different-looking finished product than you envisioned.
  • From my young friend Miss R. -- ‎"Don't be afraid it won't be perfect, the only thing to be afraid of really is that it won't BE."


Instead of binding the edges with pink satin ribbon or hemming them, I had to opted to zig-zag them with pink and purple thread.  Rather than try to get the stitching "just so," which I knew I couldn't do, I went over the stitching several times in different colors for a layered effect.  I like the way it turned out.


To finish, I zig-zagged a double length of grosgrain ribbon into the back my new notebook for place-holders, letting the stitching go a bit wonky once again.


What a fun project!  I will be interested to see how useful this turns out to be.

Friday, March 11, 2011

Finished Object Friday -- Wide Leg Lounge Pants

The finished product!
 I have been wanting to adapt my cropped lounge pants pattern to a long-pants version all winter.  (What? I never showed you the cropped pants I made last fall? Shame on me.  I will post photos when I get them out next month.)  Now that Spring is nearly here, I found the time to give it a go.
 
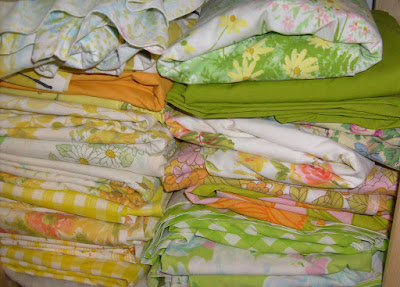
First order of business was choosing fabric for the pants from my vintage bedsheet collection.


Easier said than done.


Then there was the job of modifying the cropped pattern to a long version.  A little tedious but not difficult.  At last I chose a bedsheet, pinned my pattern pieces on and began to cut.


 My normal method for making pajama pants is somewhat slapdash, but I had pretty high hopes that this pair would turn out especially well, so I took care with the pinning.

 Then I brushed up on my buttonhole-making (okay, I made my first, second and third buttonholes ever) because I wanted to try something new with the waistband:  an elasticized drawstring.  

Here's what they looked like:

 Not impressed? Neither was I, but you have to start somewhere.  I had to do a bit of finagling to get the drawstring to come out right, but in the end it worked.  Here are the finished pants:

 I wanted to show you a picture of me wearing them, but the truth is they are shaped a bit funny and look more like clown pants than the wide-legged yoga pants that I had been going for.  

I may have to bite the bullet and buy the pair of pants I want to copy in order to get this right, instead of trying to fake it with the cropped version.  

Anyway, they're comfy and the print is cute, and they will make fine pajamas.  I'm calling the experiment a guarded success!

Sunday, November 15, 2009

Vintage, yellow and roses

What could be nicer to wear to bed? This fabulous pattern from Ducky House uses the hem on a vintage bedsheet to finish a tailor-made pair of pajama pants, and it couldn't be easier.


The pajama pants experimentation continues. I was disappointed, when I tried these on, to find that the too-high-slightly-snug-waist problem had shown up again, but this time I took action. I cut off the waist casing that I had just sewn and sewed one on the now-shorter pants, tried them on and was reasonably satisfied with the results. I'm going to make the waist on the next pair even lower, and I think that will solve the problem altogether.

And yes, for those of you who are wondering, I did iron them before I photographed them, but I doubt if I'll need to do it again as they're made with No-Iron Percale. Definitely a plus.

Thursday, November 12, 2009

Red Crosses Prayer Quilt

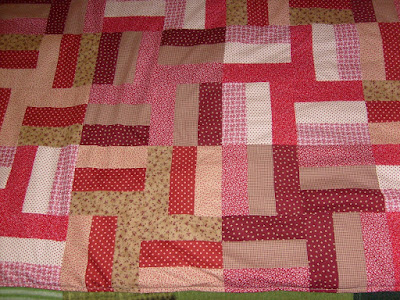
Maybe they're a little more like pinwheels, but I like the idea of thinking of them as red crosses given to someone in need -- of prayer, comfort, warmth, what have you. This quilt came out of a desire to have something to bring to our church's prayer quilting session today, and a strong urge to make something with the pretty red prints in my stash. I took nine prints and made rail fence blocks, intending to arrange them however they would go once they were all complete, and this is the pattern they took.


Like any other blanket, the red quilt attracts cats. Here it is in its full lap-quilt stature. I'll be taking it later today for folks to put the ties in.


A detailed explanation of what a prayer quilt is and information about the Prayers and Squares organization can be found here. The specifics of our church's chapter is on the Outreach and Inreach section of St. Mary's website.

Tuesday, October 6, 2009

Baptism blankets: fishing for ideas

I'm looking for a little help from the audience here; I really hope you'll all chime in with your comments and/or emails. Here's the story:

I've been asked by the folks at my church to design a "baptism blanket," which would be a special blanket given by our church to the parents of infants and young children who are baptized in the parish. (It would be part of an organization they're trying to resurrect called the Guild of the Christ Child, which in our parish would involve sponsors following the families through the infants' first three years and then helping them enroll in Church School.) The blanket should be about the size of a receiving blanket and labeled with the name of the child and the date of the baptism, but other than that I've been given no guidelines.

Here are some ideas I've had, and the problems I've encountered:

  • I have a pattern for an "eyelet bound carriage blanket," but it calls for "blanket fabric" which is impossible to buy by the yard at any local store, and although the book suggests cutting down an actual blanket, it is also impossible to buy a decent blanket for a reasonable amount of money. I have found some white wool flannel online that looks interesting, and if it felts well it will be washable (which is an unwritten requirement), but several people have told me that wool is out because they are allergic to it, because it is itchy, or because it is not washable. I kind of think I'd like to see the fabric before I throw out this option because it is the most "traditional" baby blanket I can think of.
  • I could make a simple two-layer cotton flannel receiving blanket with a "St. Mary's Blue" binding. (Another suggestion I've heard is that the blanket should include our "signature" royal blue in some aspect.) I would think some embroidery would be appropriate on the front layer to make the blanket look "special" enough. I don't have much experience with embroidery but I feel confident that I can learn to do it; or there will be ladies in the parish who have sewing machines that can do embroidery -- or possibly we could work something out with an applique. I know a woman on the altar guild who will probably have a book on church sewing and embroidery that I can raid for ideas.
  • I could make a patchwork quilt with all white-on-white prints and a white (or blue, I guess, but I kind of think that would look weird) binding. That has the advantage of being soft and washable.
  • I could use a crochet pattern that I used in making one of K's baby blankets, that would make a very nice baptism blanket, and just sew a patch to the back for the label -- we'd probably get those printed anyway. Depending on the type of yarn used, both soft and washable. (When I mentioned this option to my friends, they didn't think it would be washable, but I have tossed K's blankets in the wash over and over.)
Thoughts on these ideas? Other ideas? My mind is wide open at this point. I'm going to compile every possible option and make some test blankets, and then see where I am. I'll be sure to keep you posted.

Wednesday, September 2, 2009

Flower power

So I needed some new pajama pants. I liked the ones I had made but it was hard to keep them ironed for everyday wear, and then they didn't fit quite the way I wanted them to. Their official name is "Pajamas for Everyone" in Heather Ross's Weekend Sewing, but they really don't seem to be for people with hips or much of a waist, so I decided to try out a simple alteration.

All I did was extend the waist length by a couple of inches and adjust the legs accordingly, but it did the trick. I now have two very loud pairs of Pajamas for Me, and I expect to make many more as the days get cooler and I start pulling out the pretty flannels I have stashed away in the closet. Hooray for successful experiments!

Thursday, January 22, 2009

Warm fuzzies

Remember my vanilla-and-chocolate blanket, the dark brown wool one with the cream-colored binding? The one I was afraid to give to my dad for Christmas because it couldn't be washed? Well, I got crazy the other day and washed it.

Yes, I did, I washed it. In hot water. And dried it too, on high heat. And it did just what I thought it would. It felted. It got all soft and thick and fluffy. I love it. The only thing is that, of course, the binding didn't felt, so it's all puckered around the outside. But no biggie. It lives in my bedroom. I'm the only one who has to know. And if I get tired of it, think of the teddy bears I can make with it!

Moral of the story: Felt the sage-green suiting before turning it into a blanket. Get a nice smooth binding on it and end up with a beautiful cozy washable wool blanket, suitable for gifting -- or for keeping all to myself because oh, how I love things that are soft and warm.

Monday, January 12, 2009

Pajama pants pattern experiment

Let's just say it didn't go so well.

Ok, I got the instructions out and read them carefully. I figured out which pattern pieces I needed. I cut the pattern pieces out from that pathetic skimpy brown tissue paper. I pinned them to the fabric in such a way that they all fit with a little room to spare, and I cut them out with the rotary cutter (note: bad idea, regardless of what my sewing book says.) I cut the notches (note: cut them out, not in, next time) and penned in the dots with disappearing ink. Then I re-read the instructions and started to sew.

I tell you what, though, those dad-gum instructions are darned hard to understand, especially for someone whose visual-spatial comprehension skills are somewhat limited, as mine tend to be. Give me more verbal directions, please, explain to me what I need to do and then label your diagrams and I'll be fine.

I'm not going to tell you which parts of the pajamas I actually sewed together, or attempt to describe the anatomy of the person who could potentially wear the pants I produced. I'm just going to give it a little time, take a few good deep breaths, and try, try again.